Sections page
A custom page template that turns a single Ghost page into a topic hub. Add the tags you want to feature, and each one renders as an editorial section with its name, description, archive link, and latest stories.
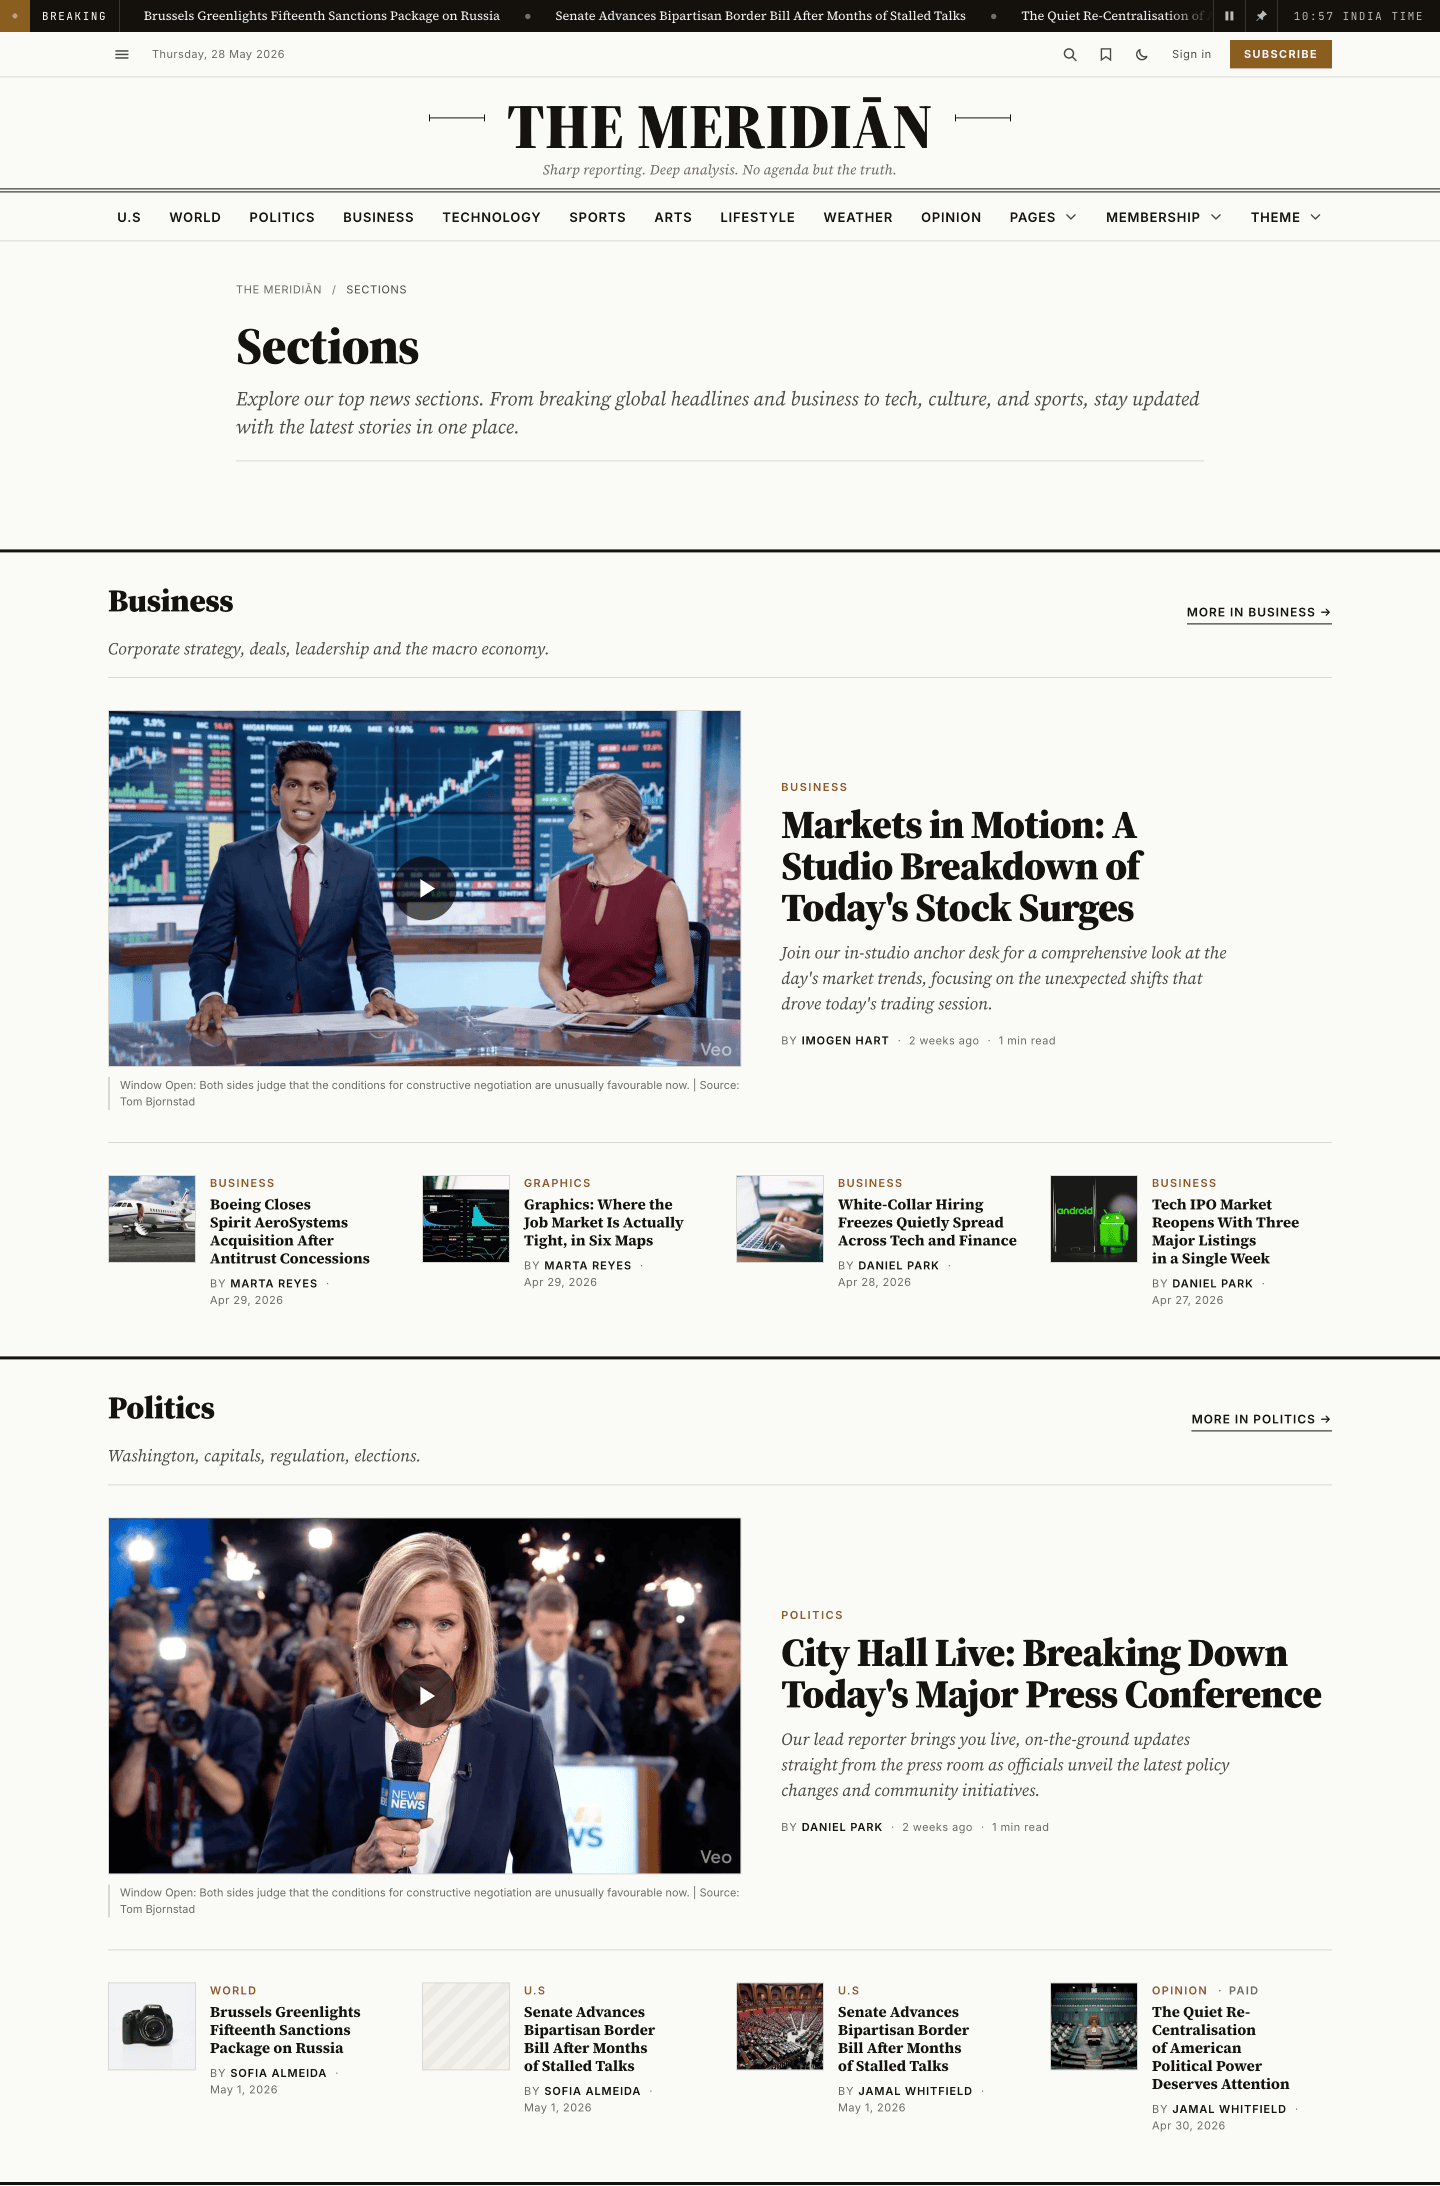
The Sections template turns one Ghost page into a browsable index of your desks. You add the tags you want to feature, and Meridian renders each one as its own editorial section — the tag's name, its description, a link to the full archive, and a handful of its most recent stories.
The model in one sentence
One Ghost page = one Sections hub. The page's title and body sit at the top; every public tag you add below becomes a section, in the order you add them.
Unlike Homepage sections — which use a separate "recipe page" per row — the Sections template is self-contained: a single page lists as many sections as it has tags.
How a section is built
For every section on the page you add one public tag. Each tag renders as a full-width row:
- Heading — the tag's name, with a
More in {tag} →link to that tag's archive. - Description — the tag's description, shown as a standfirst line (omitted if the tag has none).
- Lead story — the tag's most recent post, with its feature image and excerpt.
- More stories — the next four posts from that tag, as compact cards.
The tag's description comes from Ghost itself: Settings → Tags → (your tag) → Description. Set it there and it appears under the section heading automatically.
How to create a Sections page
Create the page. In Ghost Admin, go to Pages → New page. Give it a title — e.g. "Sections", "Browse", or "Topics". The title shows at the top of the page.
Choose the Sections template. Open the editor sidebar (the settings panel in the top-right of the editor), find the Template dropdown, and choose Sections.
No Template dropdown?
The dropdown only appears once the theme is active and the page is saved at least once. If you don't see it, save the page as a draft first, then reopen the sidebar.
(Optional) Write an intro. Anything you write in the page body renders between the title and the sections — a short welcome, a description of how the page is organised, whatever you like. Leave it empty to jump straight to the sections.
Add the tags you want to feature. In Page settings → Tags, add the public tags you want as sections — for example World, Politics, Business. The order you add them is the order the sections appear. Drag to reorder.
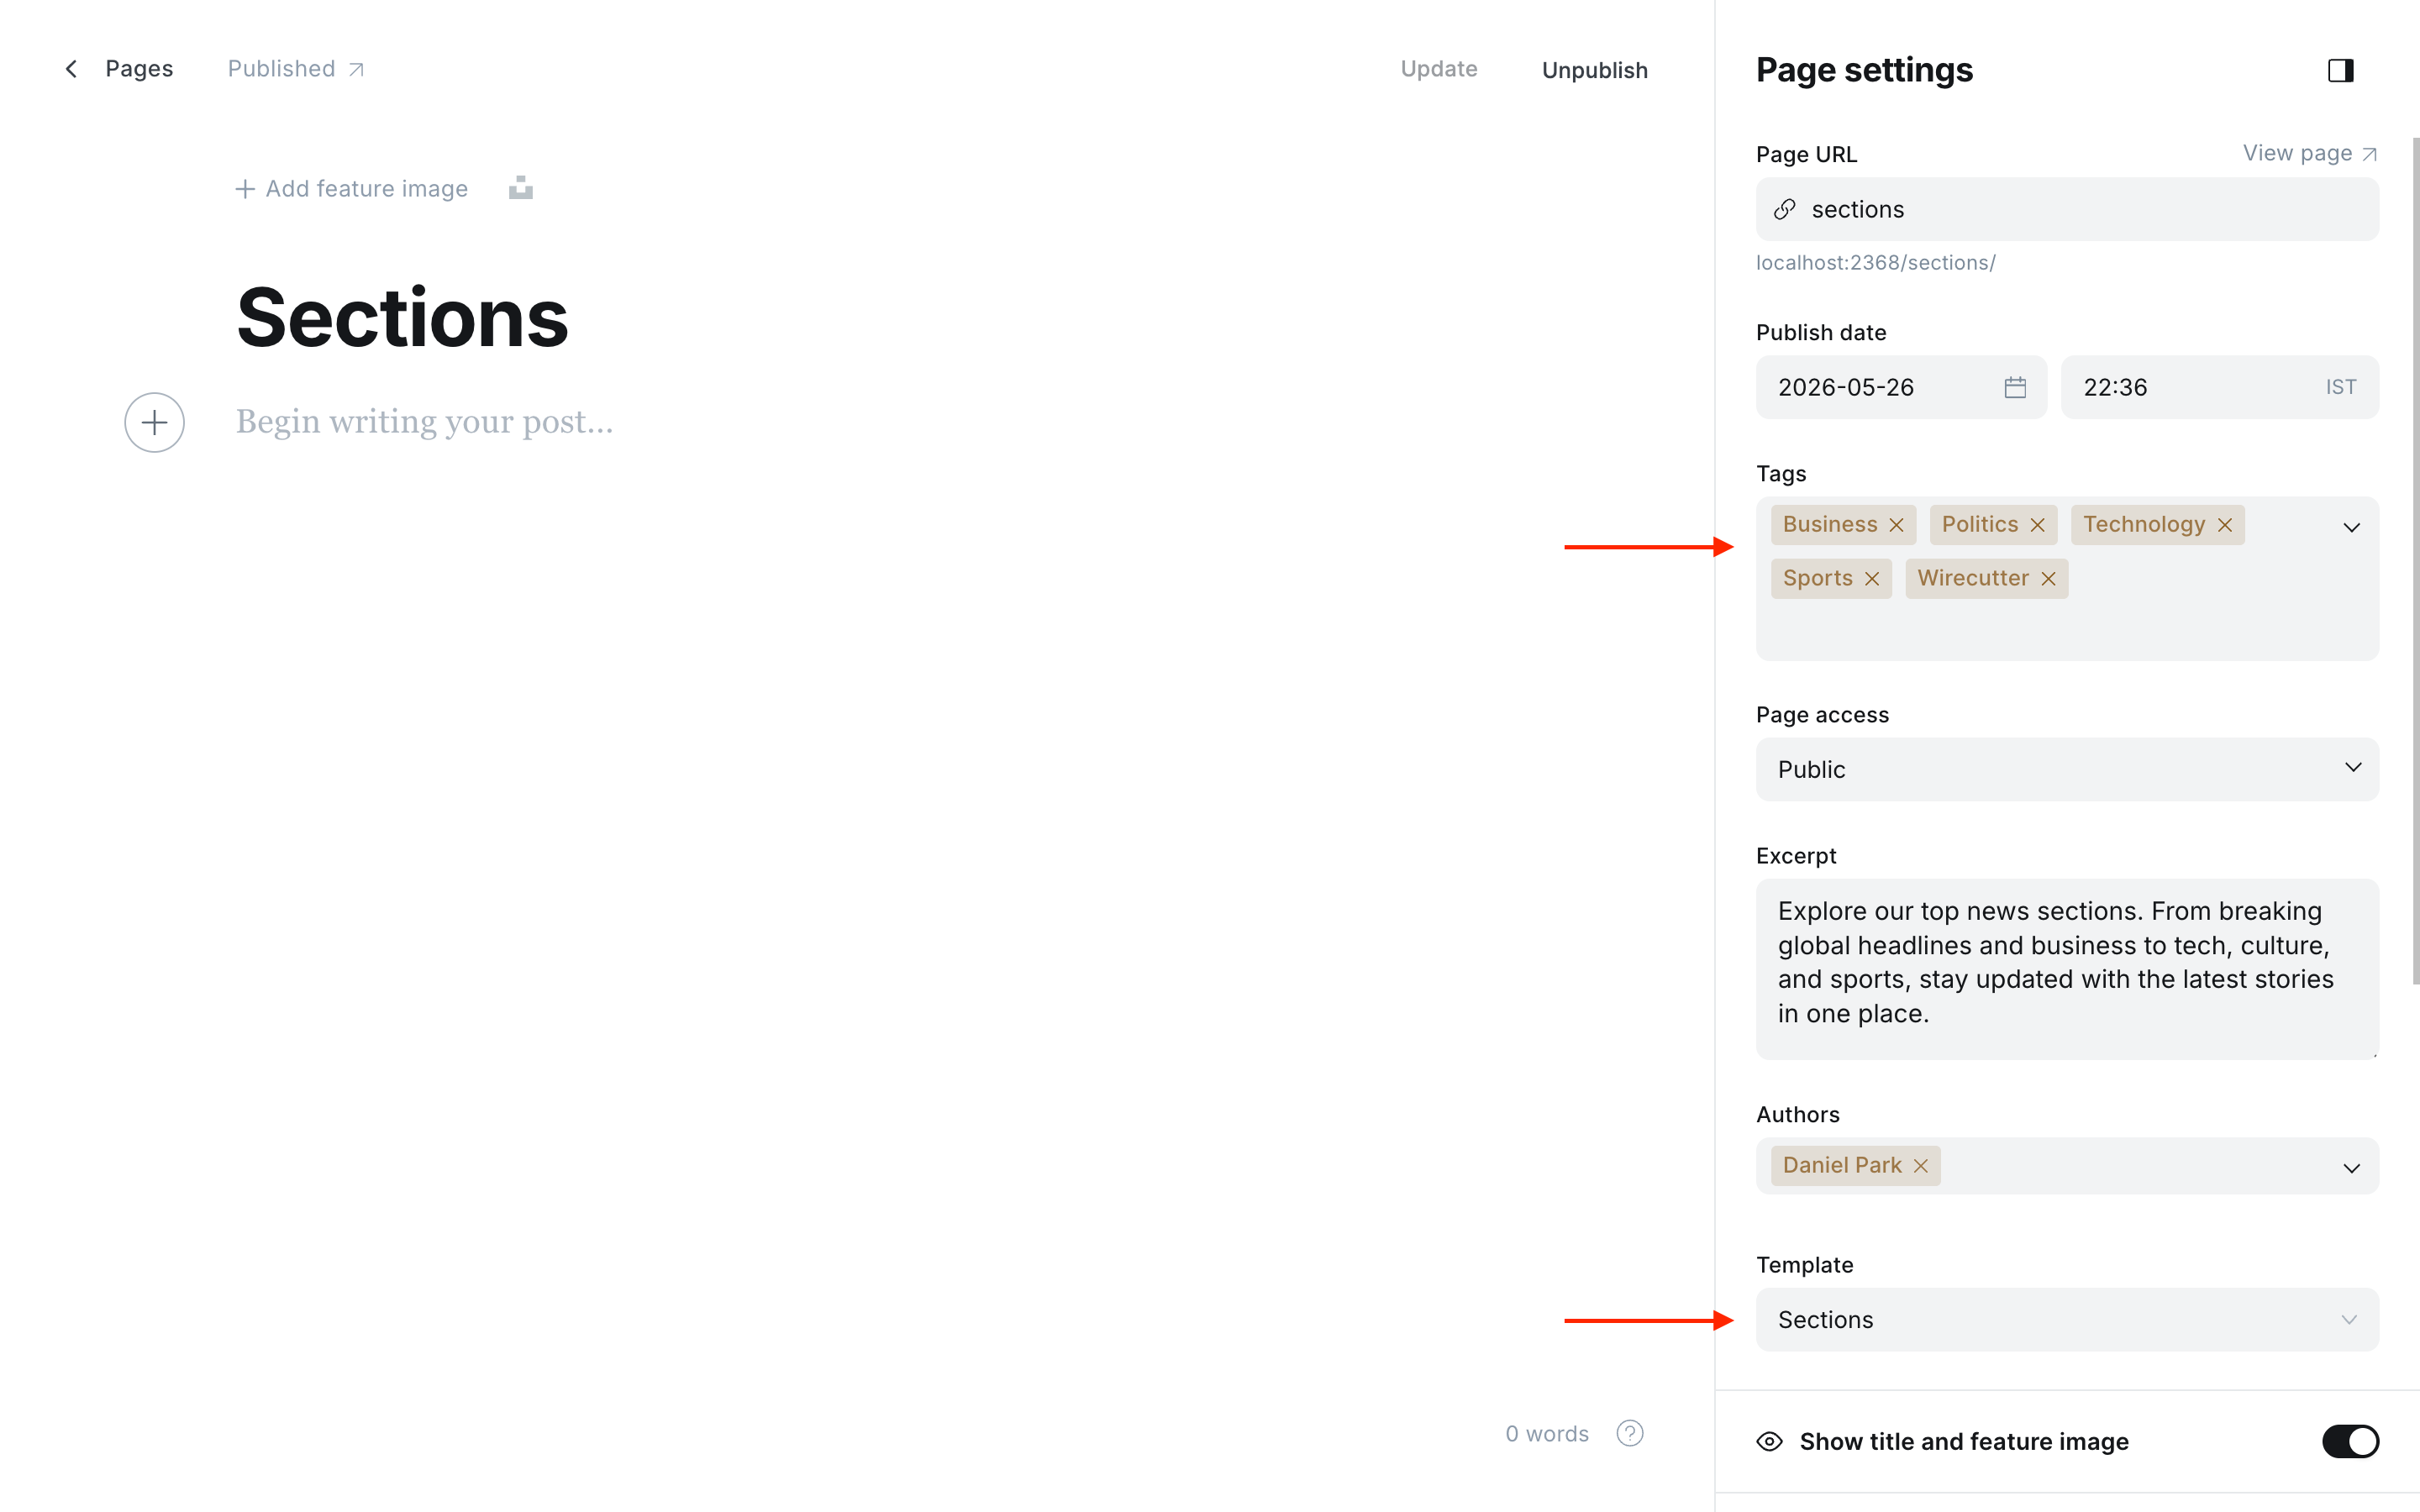
Publish. Click Publish. Visit the page — each tag now has its own section with its latest stories.
Ordering and curation
- Section order follows tag order on the page. Drag tags in Page settings → Tags to rearrange the sections.
- Each section shows the five newest posts for its tag (one lead + four), refreshed automatically as you publish.
- The
More in {tag} →link points to the tag's own archive, where readers can browse everything in that section.
What gets skipped
The page stays tidy on its own — nothing renders an empty block:
- A tag with no published posts is skipped entirely, heading and all.
- A tag with no description still renders, just without the standfirst line.
- Internal tags (those whose name starts with
#) are ignored, so workflow tags like#breakingnever turn into a section. Only public tags become sections.
A tag with just one or two stories
Sections gracefully handle thin tags — a tag with a single post shows only the lead story, and the "more stories" row fills with however many posts exist (up to four). Pick tags with a healthy backlog for the fullest-looking sections.
Tips
- Mirror your navigation. A Sections page that lists the same desks as your primary nav gives readers a single "everything we cover" landing page.
- Keep descriptions short. One sentence per tag reads best as a standfirst — see Homepage sections for how the same tags drive the homepage.
- Link to it. Add the published page to your primary or secondary navigation so readers can find it. See Navigation.