Installation
Install Signal in five steps — upload signal.zip in Ghost Admin, activate it, and add the routes.yaml file that powers the episodes and blog listings and the topic and people archives.
Quick start
Five short steps and your new theme is live.
Check Compatibility First
Before installing, make sure your Ghost installation is Ghost 6.x — Signal's minimum requirement is v6.0.0. See the Compatibility Guide.
Open Theme Settings
Go to Settings → Theme in Ghost Admin and click "Change theme".
Upload the zip
Click "Upload theme" and select signal.zip.
Activate
Click "Activate" when the upload finishes.
Upload the routes file
Signal serves episodes from an /episodes/ collection, with topic archives at /topics/ and people (guest and host) archives at /people/. Those URLs come from the bundled routes.yaml, so upload it once after activating the theme. (Your browser-local Library at /library/ doesn't come from this file — it's an ordinary page you create later.)
You have two ways to get the file:
-
Grab it from the theme zip —
routes.yamllives at the top level ofsignal.zip. Extract the archive and pick it up from there. -
Download or copy it from here — same file, no extraction needed:
Downloadroutes.yamlroutes.yaml ## Signal — routes.yaml ## ## Upload this file in Ghost Admin → Settings → Labs → "Upload routes file", ## then restart or re-upload whenever it changes. It powers the /episodes/ and ## /blog/ listings and the /topics/ and /people/ archives. ## ## Optional — to set the heading and SEO for your Episodes and Blog listings, ## create published Pages slugged "episodes-index" and "blog-index". Your Library, ## Subscribe, Guests, Hosts, Contact, and About screens are ordinary Pages: create ## each one with its matching slug. Step-by-step guide: ## https://docs.enova.studio/docs/signal/getting-started/installation routes: /: template: index collections: /blog/: permalink: /blog/{slug}/ template: page-blog filter: 'tag:hash-blog' data: page.blog-index /episodes/: permalink: /episodes/{slug}/ template: page-episodes filter: 'tag:-hash-blog' data: page.episodes-index taxonomies: tag: /topics/{slug}/ author: /people/{slug}/
In Ghost Admin, go to Settings → Labs → Beta features → Upload routes file and choose the routes.yaml you just saved.
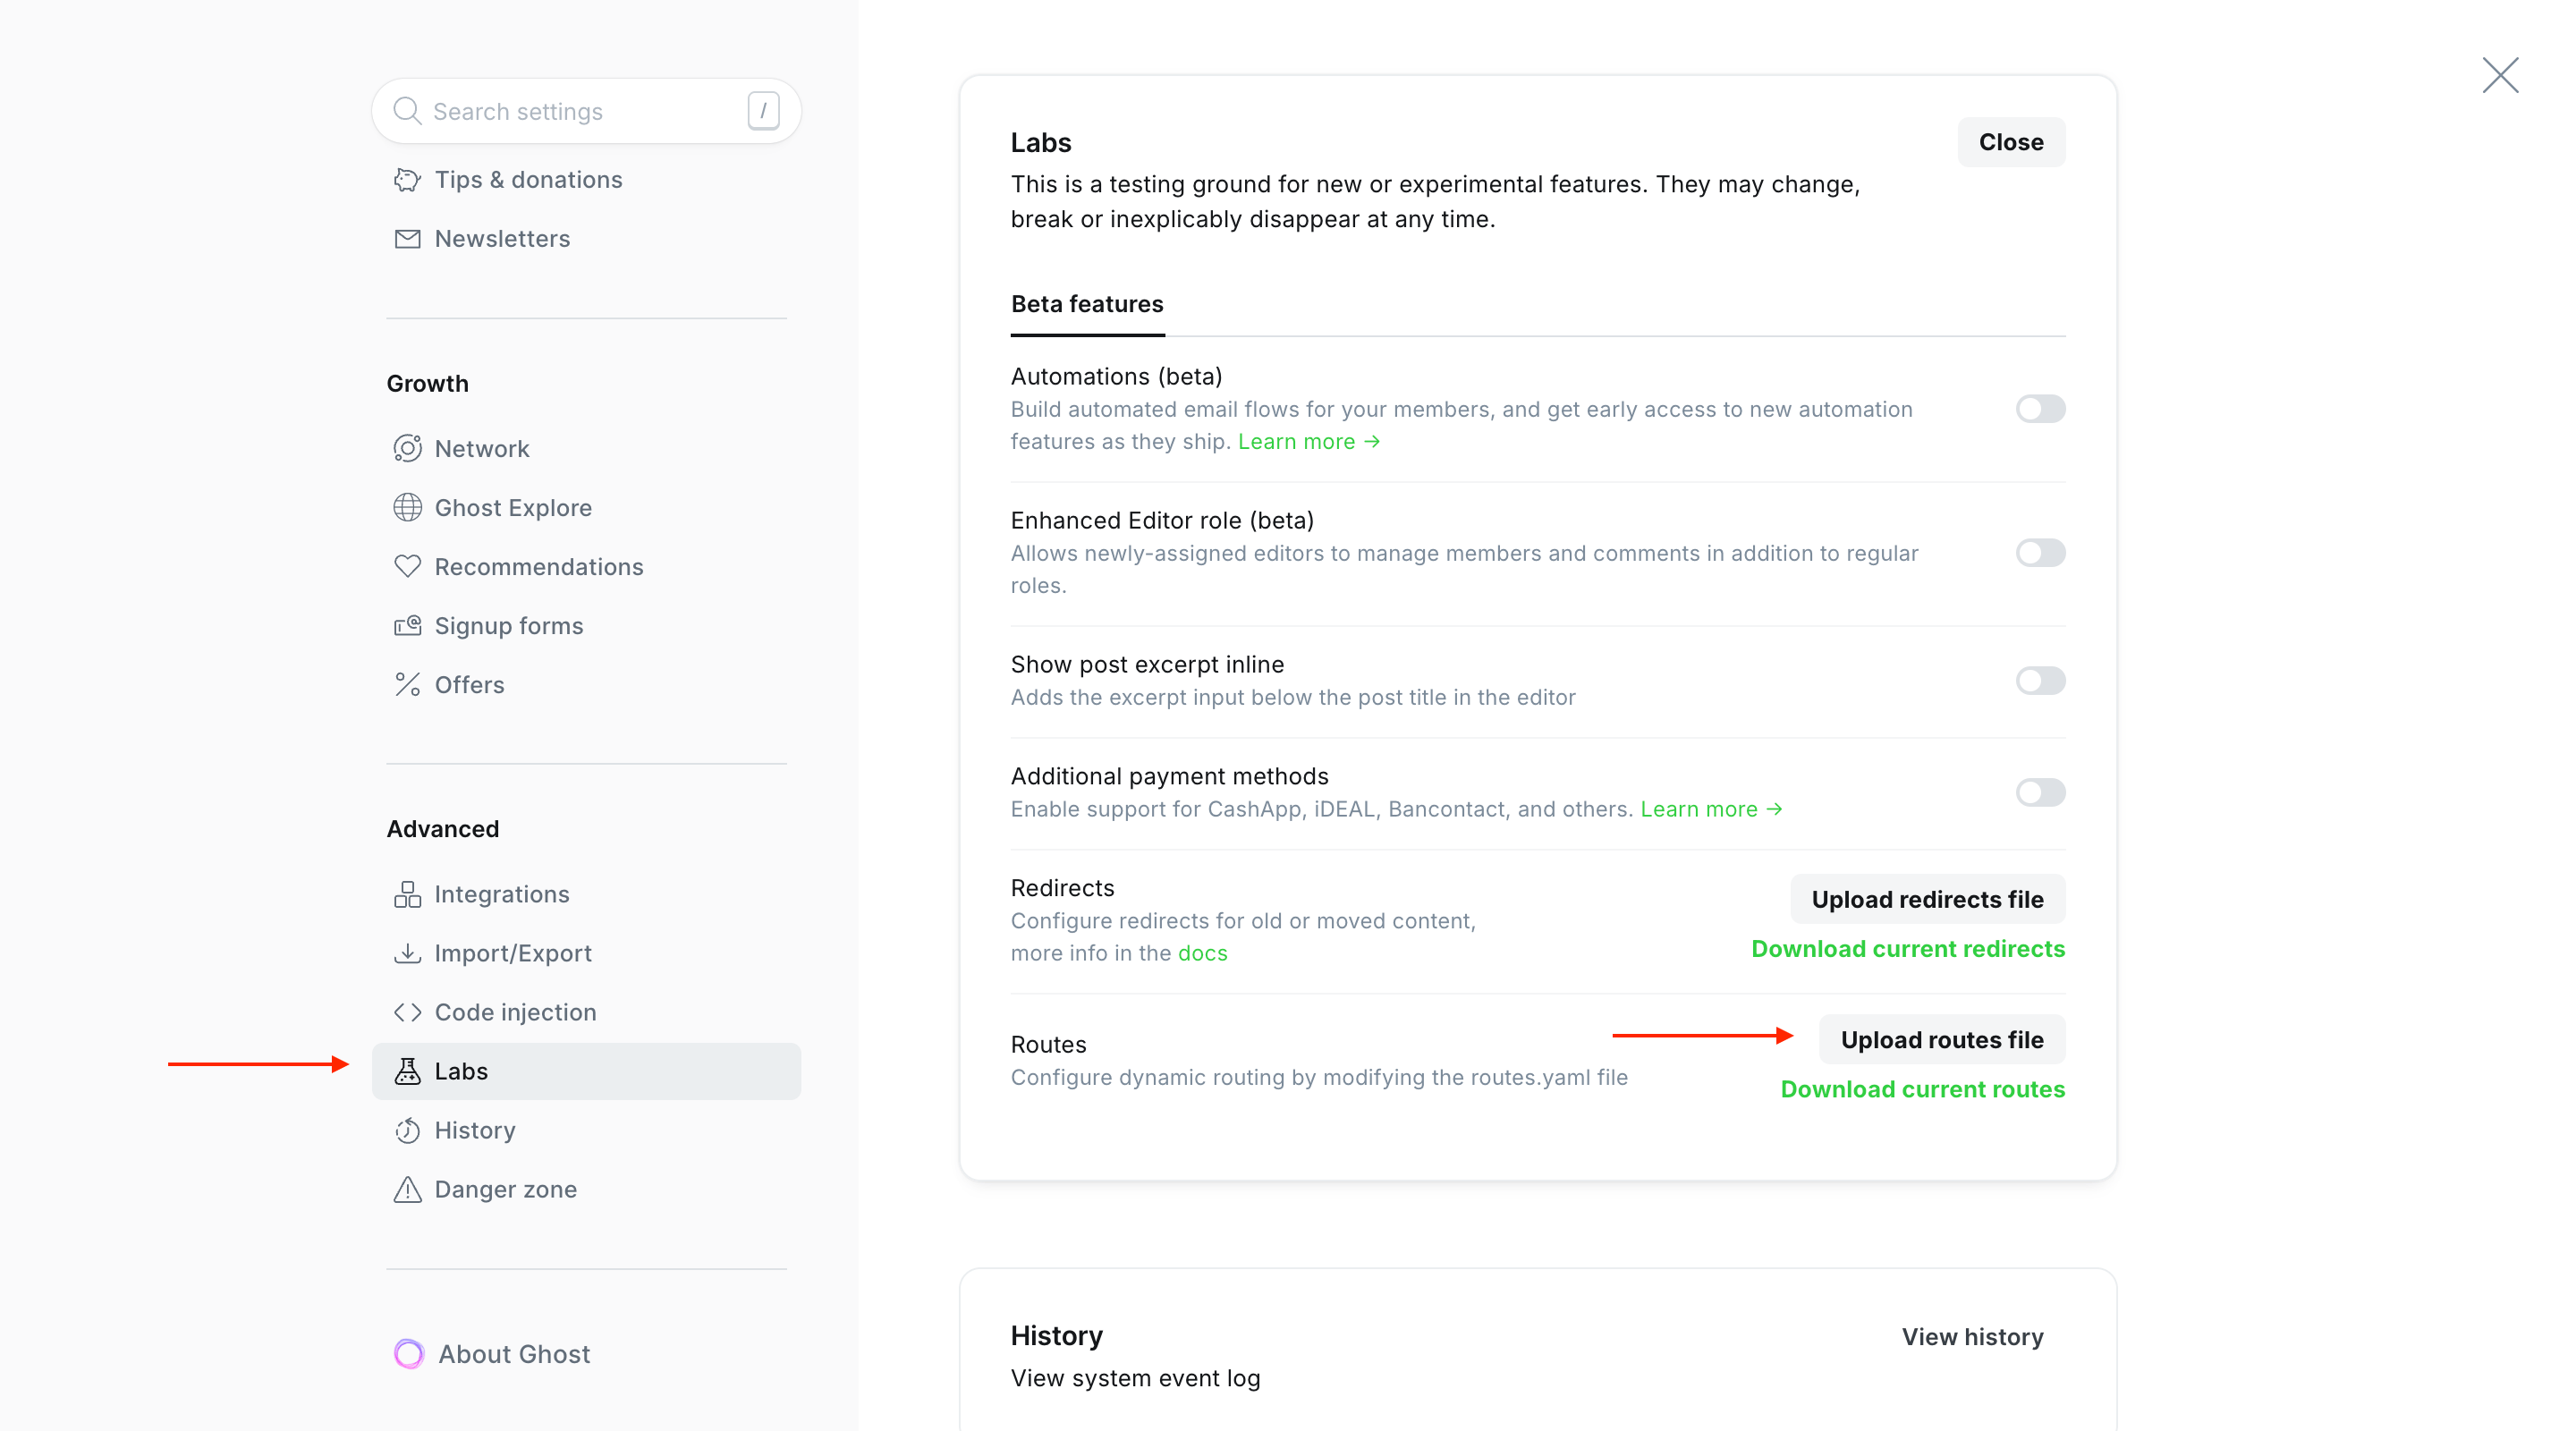
Skip this step and /episodes/, /blog/, /topics/, and /people/ return 404s. You only need to do it once per install — re-upload only if the file changes between releases.
Add titles to your Episodes and Blog pages
Give your Episodes and Blog listings a proper title and a tidy preview when they're shared. You create one short page for each, and you only do this once.
Do these steps twice, once for each row in the table below:
- In Ghost Admin, open Pages and click New page.
- Type the title — this becomes the big heading on the screen (for example, "All Episodes").
- Click the settings icon (top right) to open Page settings.
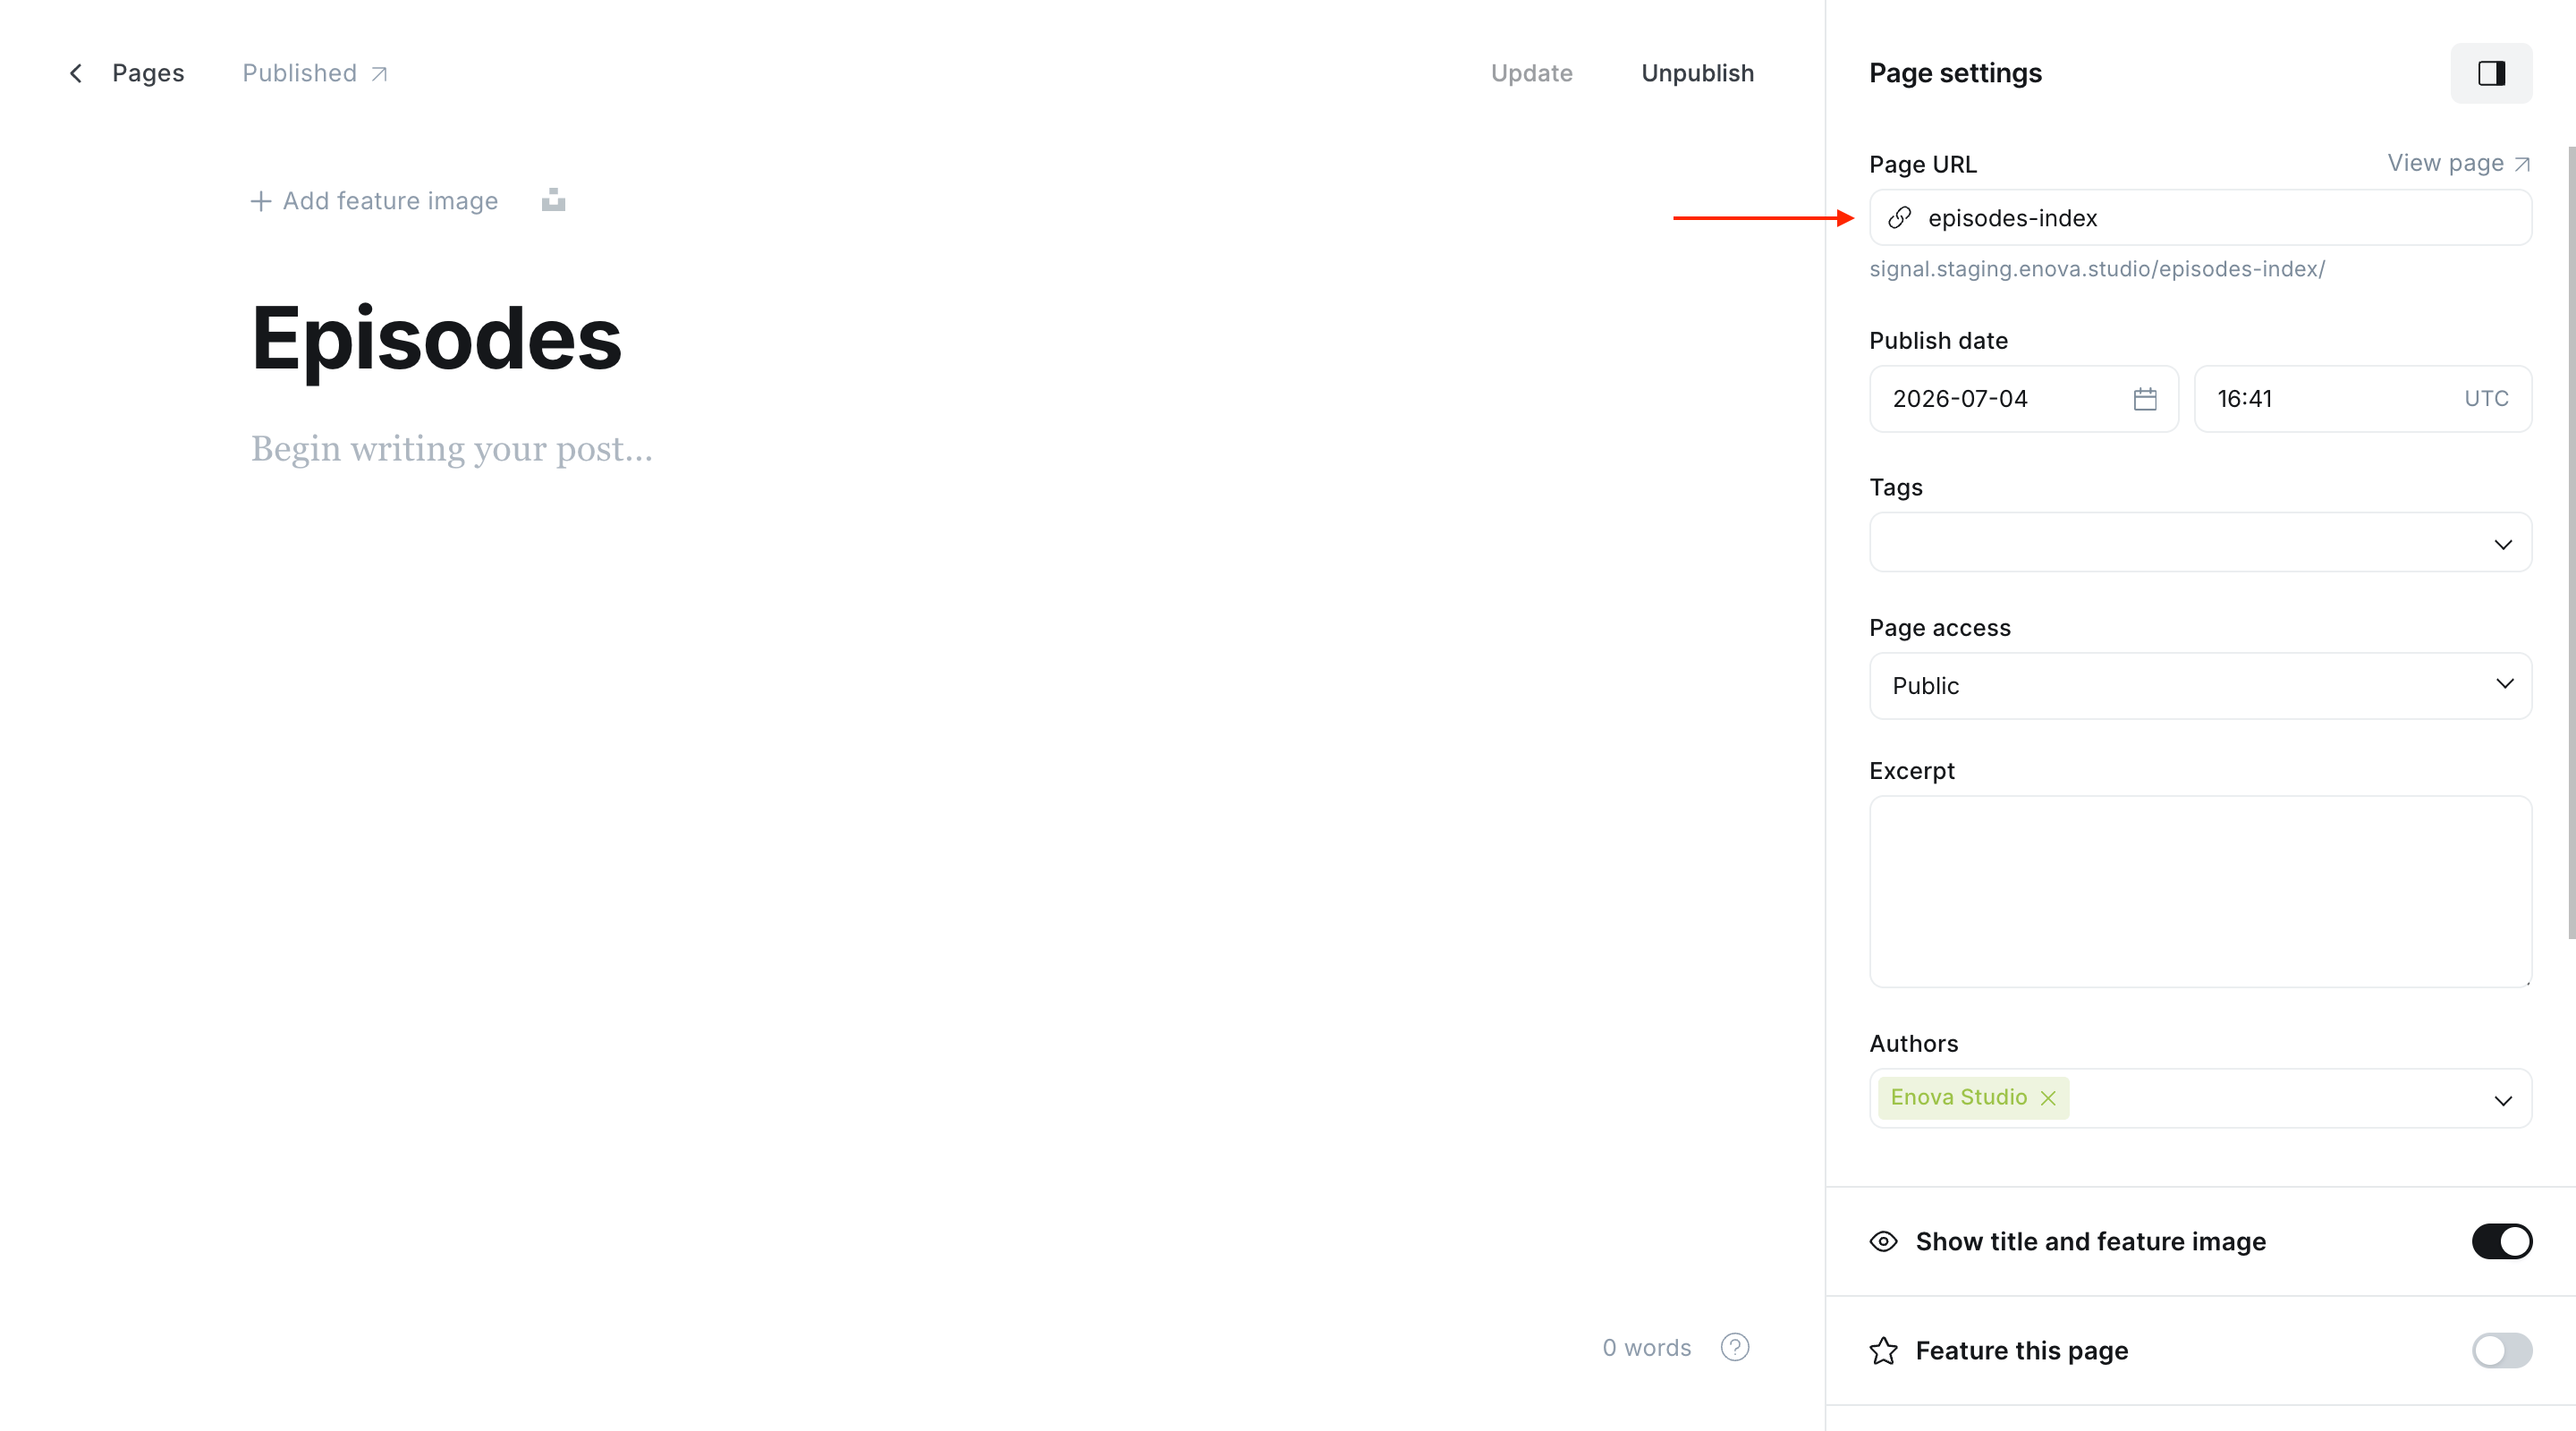
- In Page URL, enter the exact address from the table.
- (Optional) Add a short line in Excerpt to show under the heading, and fill in Meta data to set how the page looks in Google and when shared.
- Click Publish — you can leave the page body empty.
| Give the page this title | Set Page URL to | This controls |
|---|---|---|
| All Episodes | episodes-index | your Episodes listing |
| The Blog | blog-index | your Blog listing |
Episodes index page
Blog index page
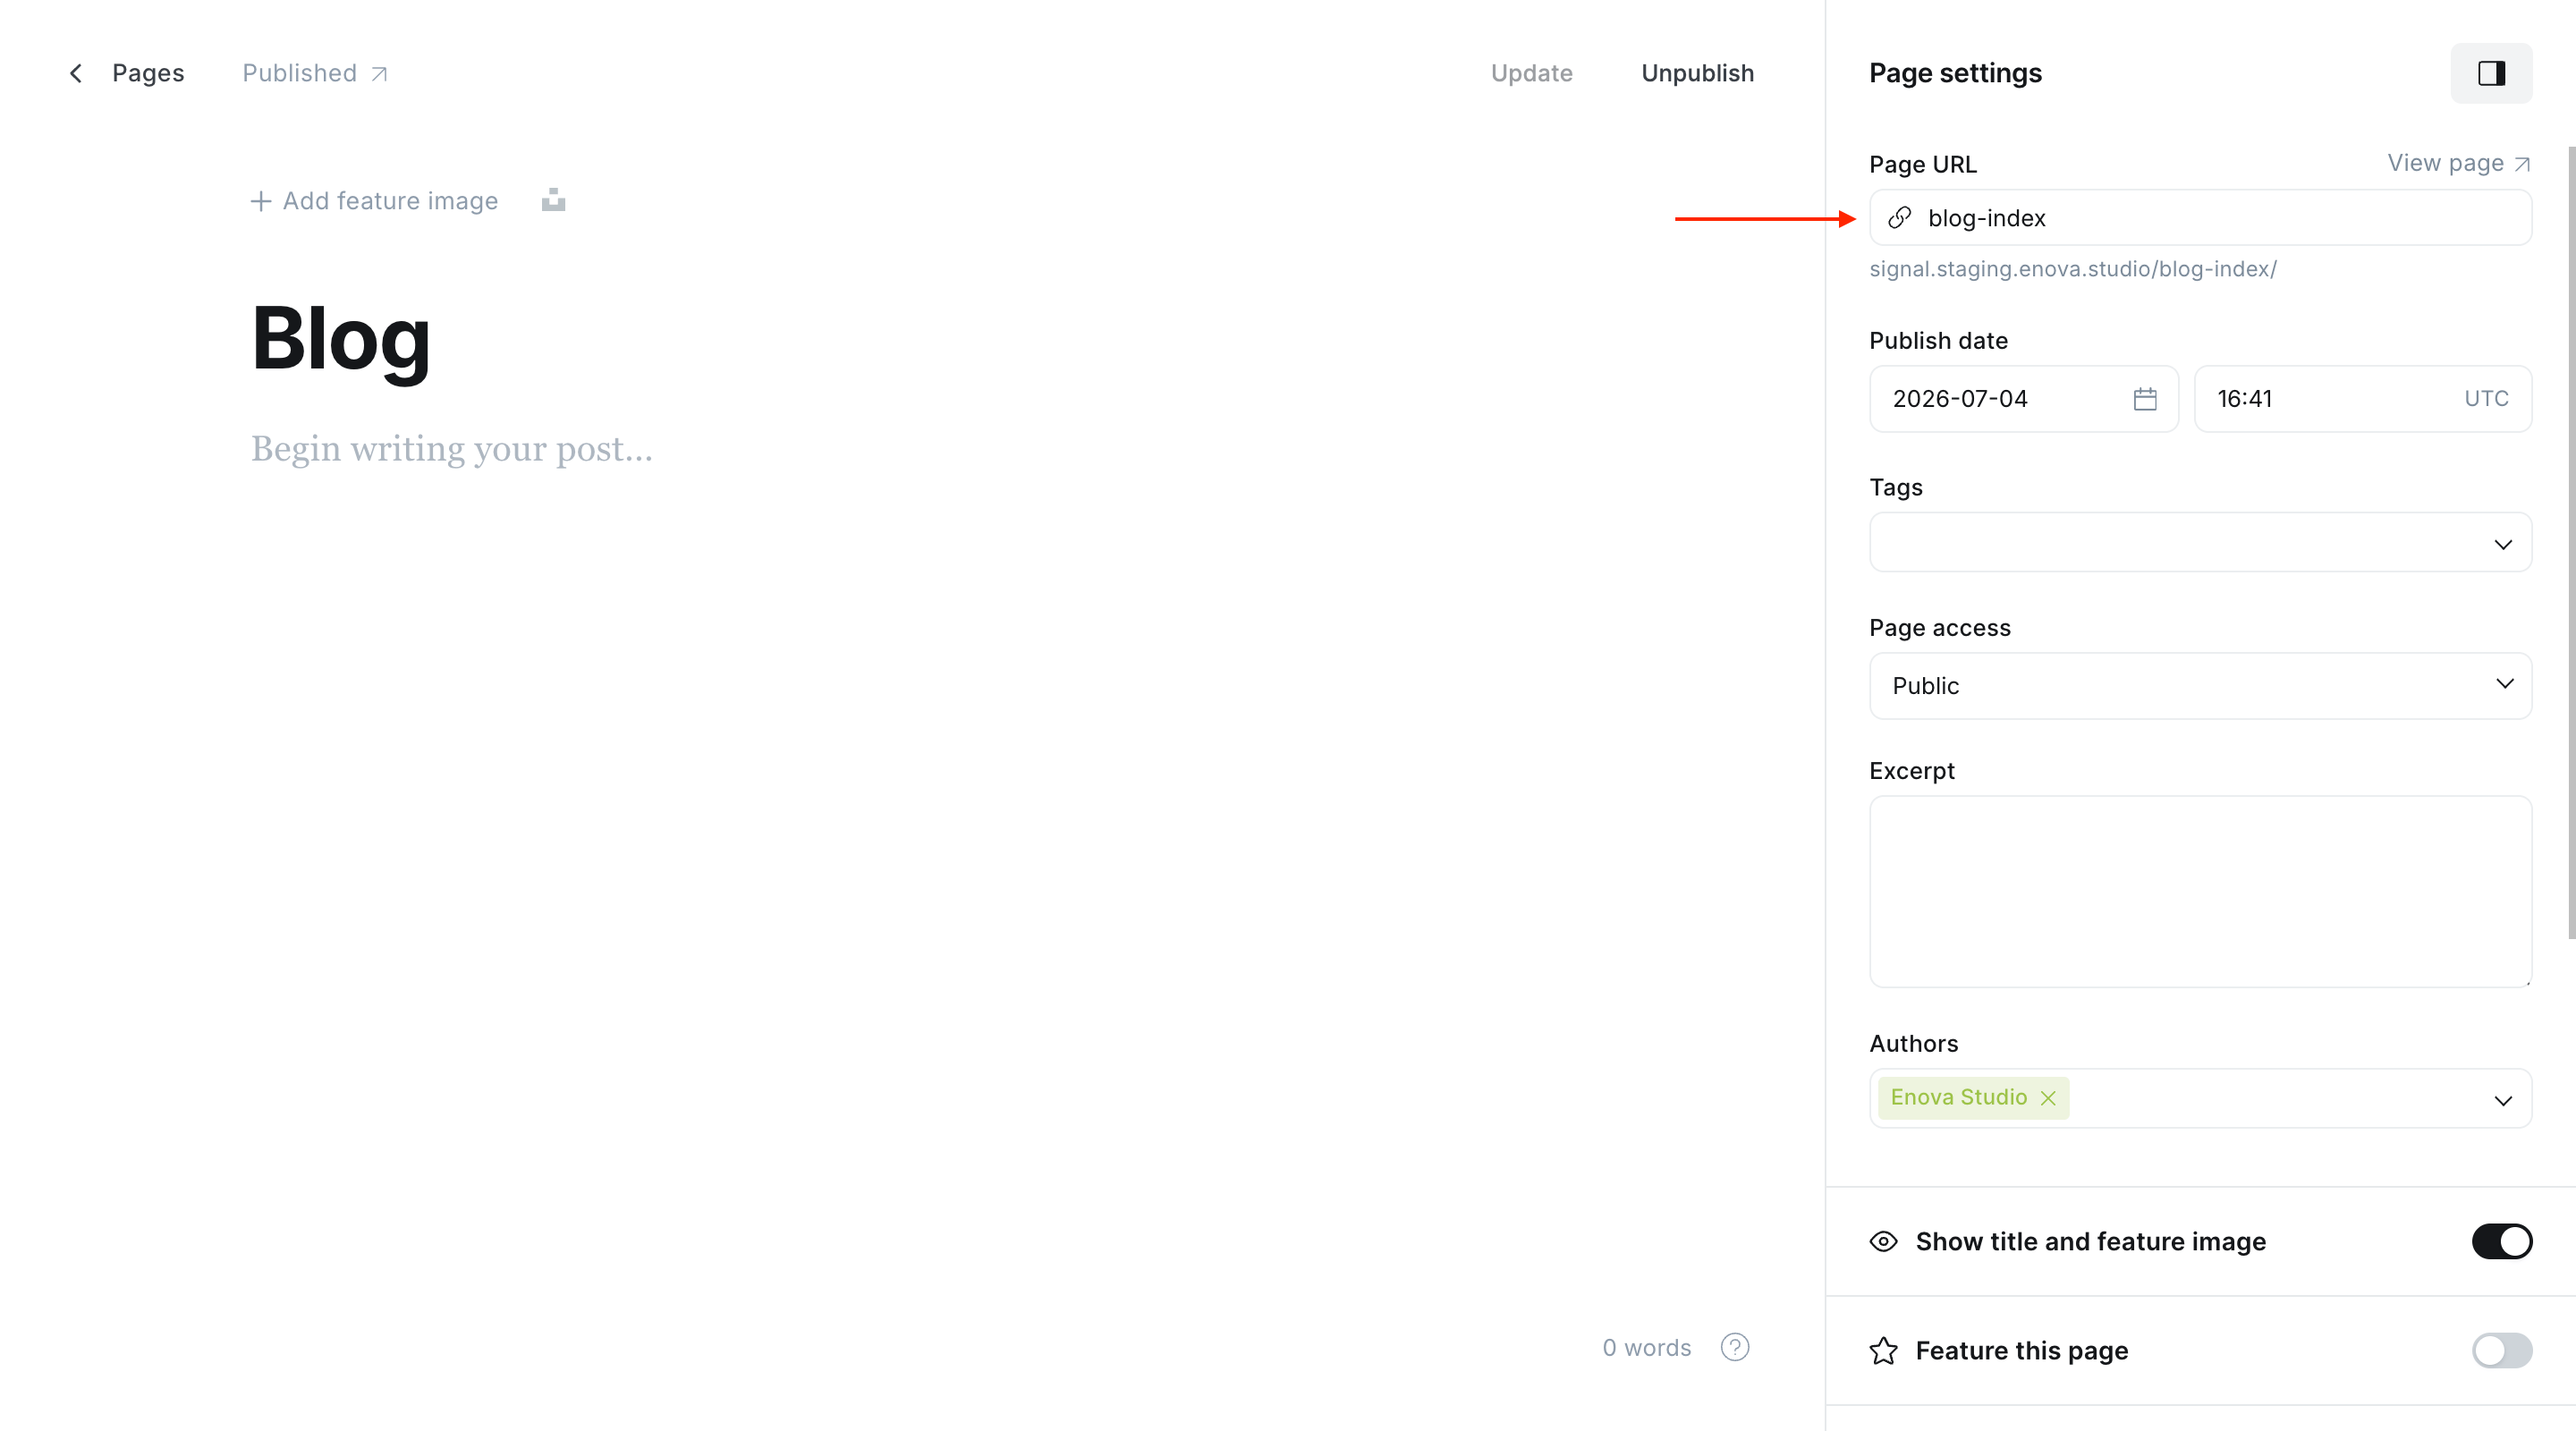
Type the Page URL exactly as shown (for example episodes-index, not episodes). Both pages are optional — skip them and each listing still works with a built-in title.
Your other pages
Signal's Library, Subscribe, Guests, Hosts, Contact, and About screens are ordinary Ghost Pages too. Create each one with its matching slug — see Page templates.
Next
Signal is installed and your routes are in place — now publish your first episode.
Compatibility
Signal runs on Ghost 6.x (v6.0.0+) and modern browsers. Check your Ghost version, what the persistent player needs, and what to do if you're still on v5.x.
Publish your first episode
Go from a blank editor to a live episode page — add the title and cover, drop in your video or audio, write the show notes, and publish.